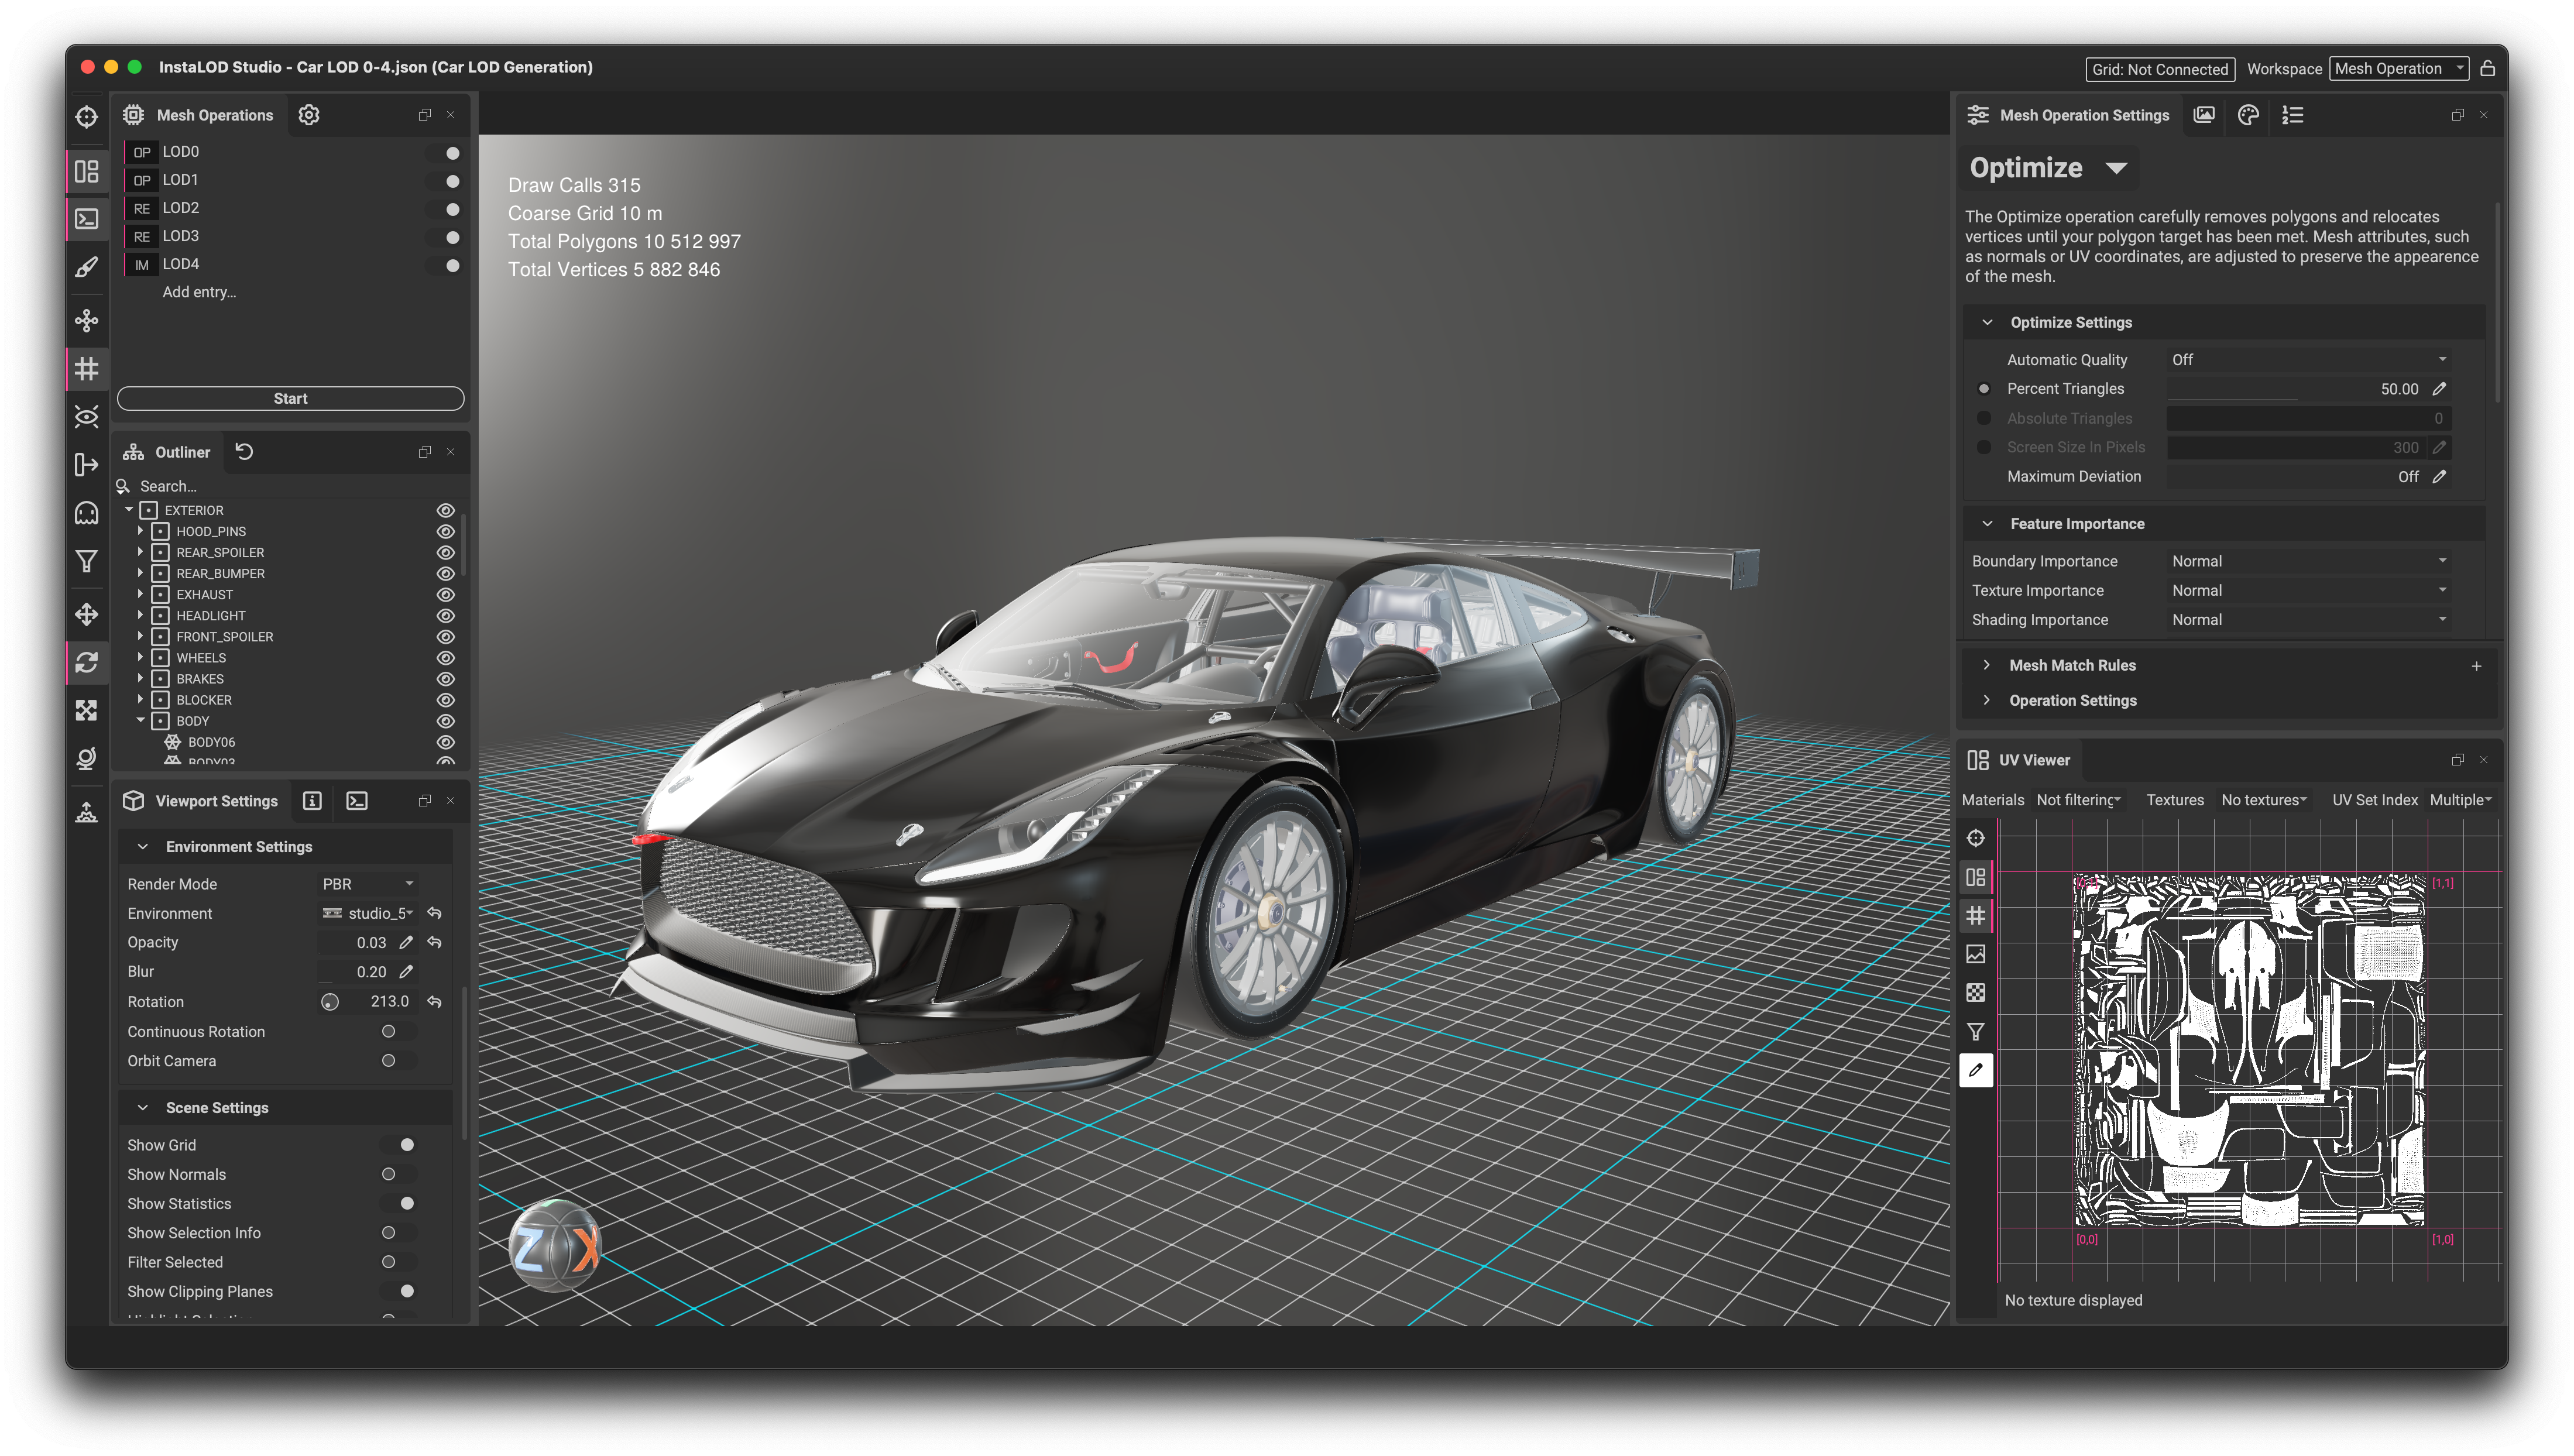
InstaLOD Studio's interface is comprised of multiple dedicated panels that can be arranged, positioned, and grouped on either side of the central viewport area.
¶ Panel Layout
To reposition a panel, click the (Undock) icon to pop the panel out into its own window. You can then use the panel as a separate window, or drag the window onto different locations of the main window to re-dock it into a different place.
To close a panel, click the (Close) icon. If a panel is in a tabbed group, clicking the close icon will only close the active tab.
All panels can be toggled on and off from the
Windowsmenu in the main menu.
To prevent panels from being closed or moved, click the (Lock Windows) icon in the top right corner of the main window. This will also disable the actions to toggle each panel in the Windows menu.
¶ Resetting the UI
 The InstaLOD Studio's UI can be reset to the default layout by going to
 Windows > Reset Workspace in the main menu. The current workspace is defined by the menu in the top right corner of the main window. The active workspace is enabled depending on the type of operation curently being performed in InstaLOD Studio.
¶ Toolbar
Along the left of the main window is the toolbar. This toolbar provides access to various shortcuts for some of the most used functions when working in InstaLOD Studio.

| Number | Name | Description | Hotkey |
|---|---|---|---|
| 1 | Focus | Focuses the camera on the selected object. If no objects are selected, the camera will focus on the scene center. | F |
| 2 | UV Viewer | Toggles the UV Viewer panel. |
Cmd/Ctrl + U |
| 3 | Output Log | Toggles the Output Log panel. |
Cmd/Ctrl + L |
| 4 | Vertex Painting Mode | Toggles Vertex Painting Mode. This mode can be used to create optimizer weights for the Optimize mesh operation. |
Cmd/Ctrl + P |
| 5 | Render Wireframe | Toggles rendering a wireframe of the selection in the Viewport. |
1 |
| 6 | Render Grid | Toggles rendering a grid in the Viewport that automatically adjusts its grid size. |
2 |
| 7 | Render Backfaces | Toggles rendering backfaces in the Viewport. |
3 |
| 8 | Render Vertex Normals | Toggles visualizing the vertex normals of the selection in the Viewport. |
4 |
| 9 | Highlight Selected Objects | Highlights the selected objects in the Viewport. |
Cmd/Ctrl + H |
| 10 | Mesh Filter | When enabled, only selected objects will be processed by InstaLOD. If objects are selected, others will be hidden in the Viewport. This filter is separate from the filter in the Material Editor panel which only displays materials assigned to the selected meshes. |
Cmd/Ctrl + F |
| 11 | Translation Gizmo | Enables the translation gizmo in the Viewport. |
W |
| 12 | Rotation Gizmo | Enables the rotation gizmo in the Viewport. |
E |
| 13 | Scale Gizmo | Enables the scale gizmo in the Viewport. |
R |
| 14 | Gizmo Orientation | Toggles the gizmo axes orientation between world and local space. | Q |
| 15 | Raytracing | Toggles the Raytracing window. |
Cmd/Ctrl + T |
¶ Viewport
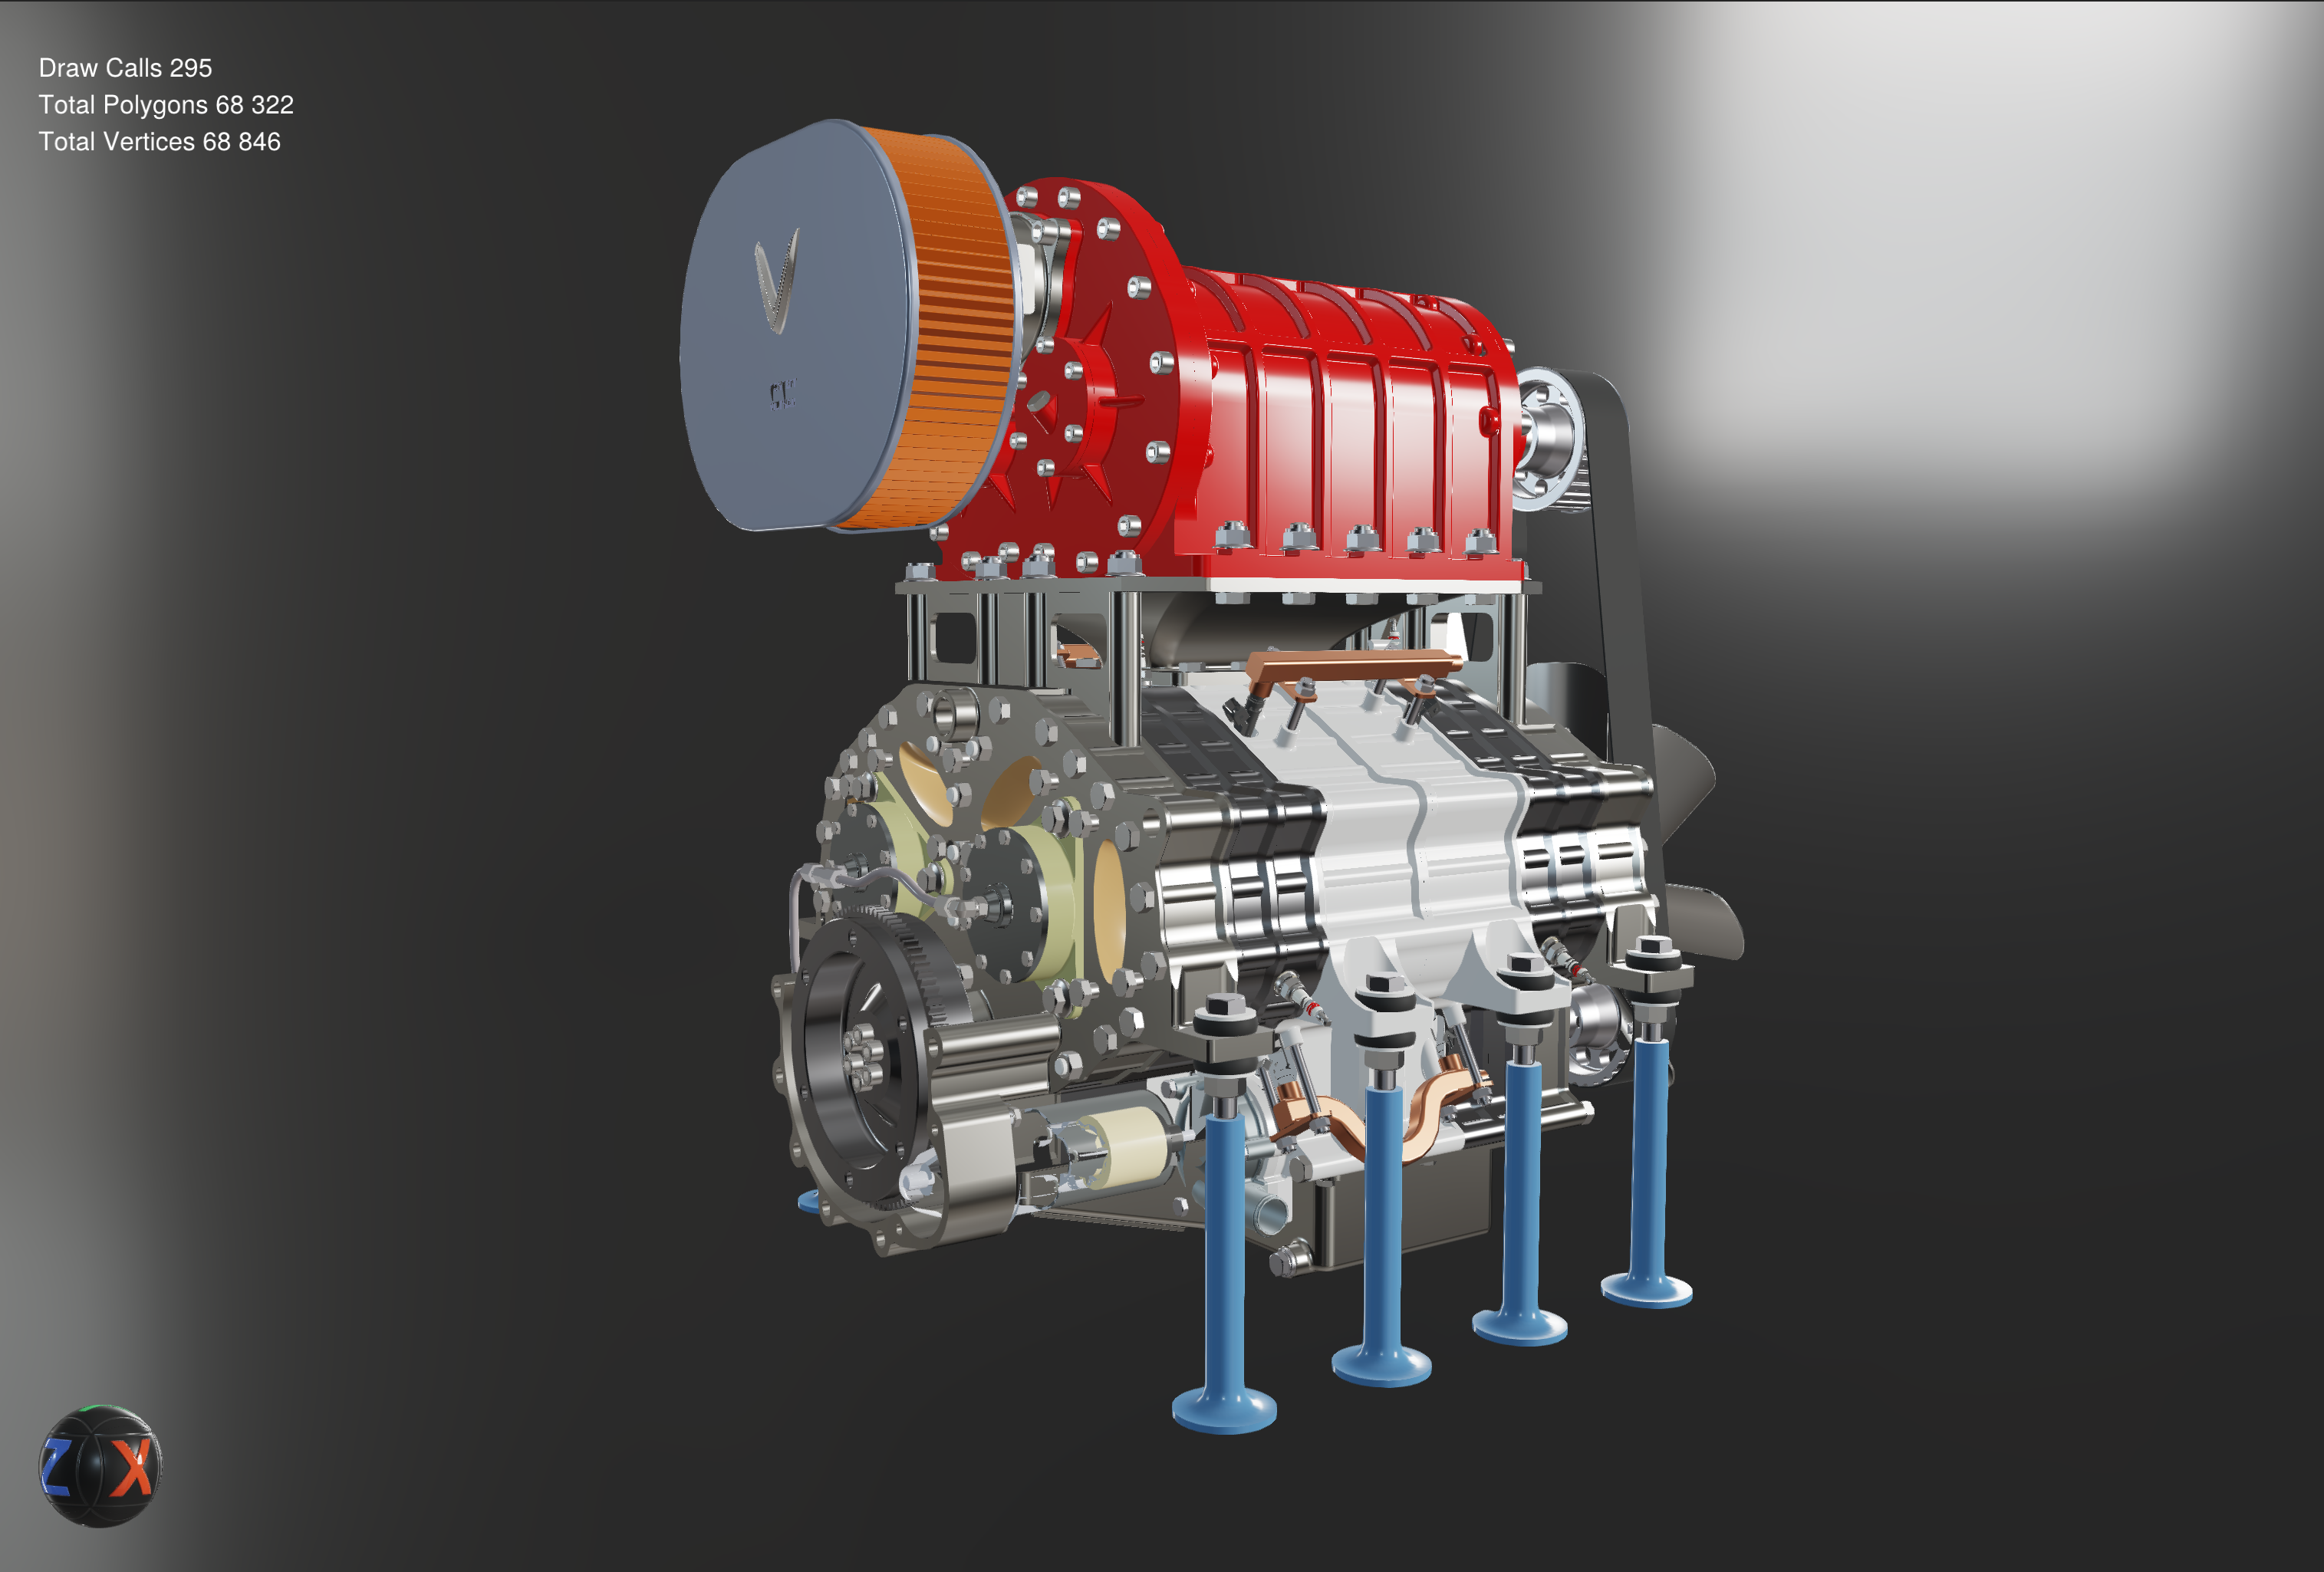 InstaLOD Studio features an extremely fast and highly accurate physically-based 3D rendering viewport. To learn more, please read our dedicated article here.
¶ Timeline
Across the top of the Viewport is a timeline of mesh operations. This allows the user to go back in time to a previous stage in processing the scene by clicking on a timeline entry.

A timeline entry is made when a mesh operation is run using the Start button in the Mesh Operations panel. Timeline entries are appended when an additional mesh operation is applied to an already-processed scene. The following dialog appears when running a mesh operation on a scene that has already been processed.

¶ Converting a Timeline into a Profile
A sequence of timeline entries can be converted into a resusable "profile". A profile is the native document type created in InstaLOD Studio.
To convert a timeline into a profile, click the triangle next to the latest timeline entry and choose Convert Timeline To Profile. Each timeline entry will be transformed into a mesh operation and will be visible in the Mesh Operations panel.

Profiles can be resued as templates within InstaLOD Studio, our Integrated Plugins, in InstaLOD Grid, or with our commandline-based interface: InstaLOD Pipeline.
¶ Panel Overview
The following section overviews InstaLOD Studio's panels based on the default layout in which they are grouped together.
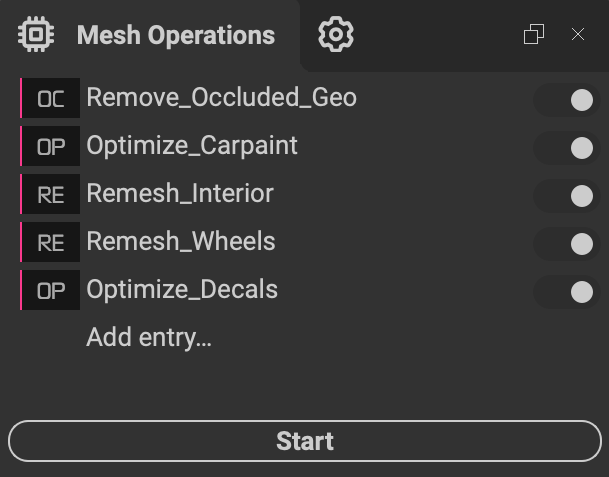 The
The Mesh Operations panel lists the operations contained in an InstaLOD Profile. Entries can be added by clicking on the Add entry... area. Once added, entries can be reorded by dragging and dropping. Each entry has a toggle to the right which will enable or disable the Mesh Operation when the profile is executed.
To execute the Mesh Operations in a Profile, click the Start button.
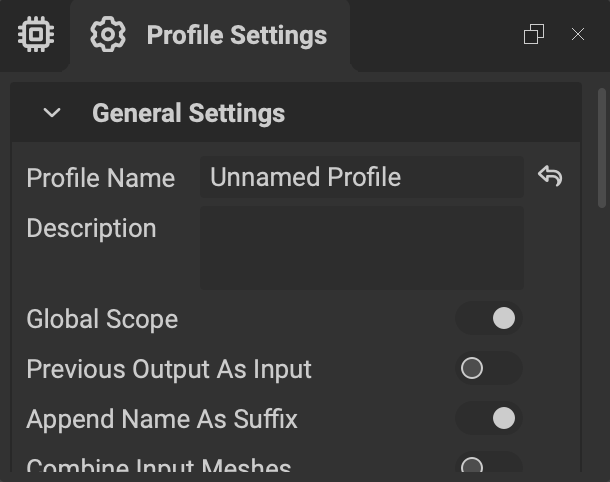 The
The Profile Settings panel contains global settings for the overall profile.
A profile is the native document type created in InstaLOD Studio and is saved as a human-readable JSON file. These profiles can be reused as templates in InstaLOD Studio as well as in our other InstaLOD products such as our integrations, InstaLOD Grid, and InstaLOD Pipeline.
The following overviews the settings available in this panel:
¶ General Settings
- Profile Name: The name of the current profile.
- Description: The description of the current profile.
- Global Scope: Disabling global optimization will instruct InstaLOD to optimize each selected mesh in an isolated manner. Individual meshes will not influence the optimization of other meshes in the selection. It is recommended to keep global optimization enabled.
- Previous Output As Input: Enable to use the previous output in the operation chain as input for the successive operation. This is useful to create powerful chains of mesh operations.
- Append Name As Suffix: Appends the name of the mesh operation as suffix to output meshes. Cannot be disabled when there is more than one mesh operation entry.
- Combine Input Meshes: Combining supports both skeletal meshes and static meshes. NOTE: Combining meshes with skinning deformers, where the pose of frame 0 is different with the bind pose may result in distorted mesh attributes.
- Smoothing Group Type: Smoothing group type to be applied before processing.
¶ LOD Group Settings
- Create: Group output meshes per optimization chain entry.
- Apply Attribute: Apply the LOD Group attribute for proper LOD behavior inside applications that support it.
- Always in Scene Root: When creating a LOD Group, always create the LOD Group in the scene root node instead of relative to the input mesh nodes.
¶ Export Settings
- Embed Media: In addition to writing media files to disk, embed media inside FBX files for easy hand-offs.
- UVs: Export per-vertex UV set data.
- Normals: Export per-vertex normal data.
- Binormals And Tangents: Export per-vertex binormal and tangent data.
- Smoothing Groups: Export per-polygon smoothing group data.
- Vertex Colors: Export per-vertex color set data.
- Empty Meshes: Export empty meshes.
- Empty Nodes: Export empty nodes.
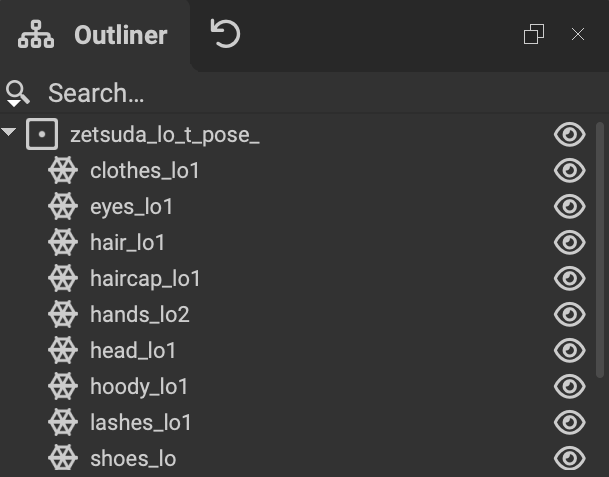 The
The Outliner panel lists all objects in the active scene. This includes meshes, groups, lights, and cameras. Click the (Eye) icon to toggle the visiblity of the corresponding group or node.
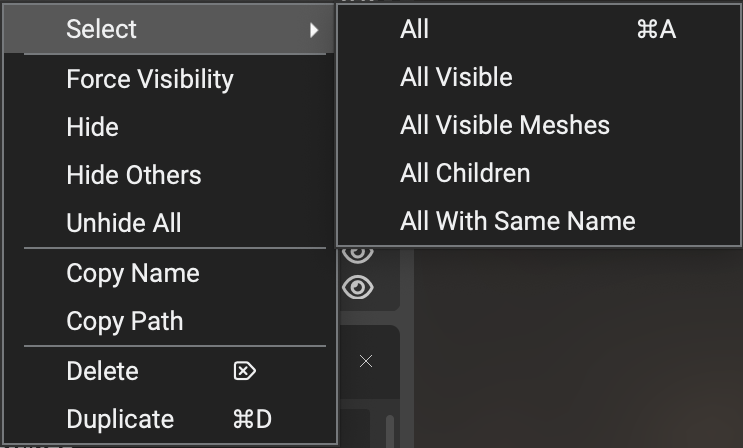 Right-clicking on a node provides a contextual menu with quick acces to various selection, visibility, and scene management options.
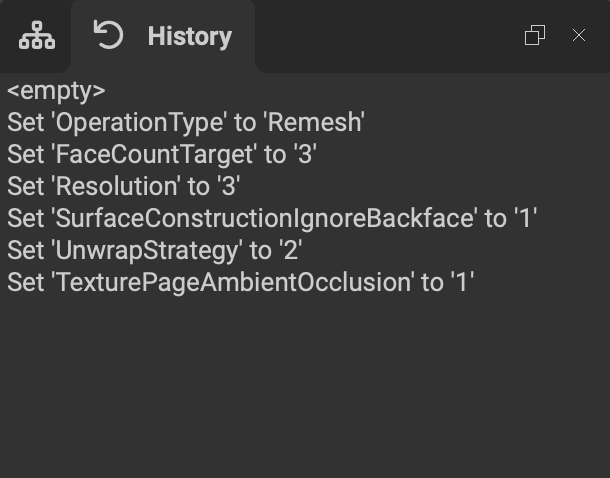 The
The History panel lists all actions performed before running a mesh operation. Clicking on an item will revert back to the corresponding step in the past. Performing an action afterward will overwrite the previous 'future' actions. Running a mesh operation will result in clearing the history.
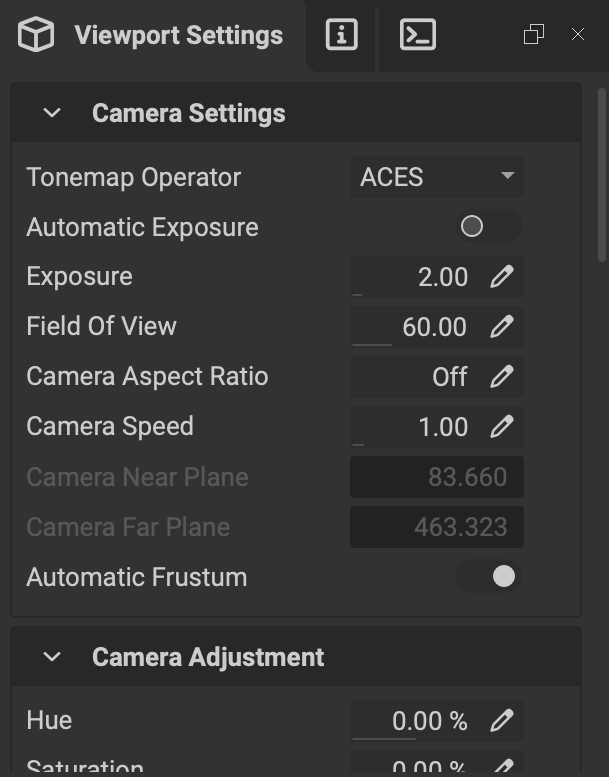 The
The Viewport Settings panel contains settings for InstaLOD Studio's 3D viewport. This includes settings for the camera, environment, gizmos and statistics, as well as render settings.
The following overviews the settings available in this panel:
¶ Camera Settings
- Tonemap Operator: Sets the tonemapping type for the
Viewport. - Automatic Exposure: Automatically adjusts the exposure of the camera based on lighting changes.
- Exposure: Manually sets the exposure of the camera effectively setting the amount of light it captures.
- Field Of View: Sets the horizontal field of view of the camera in degrees.
- Camera Aspect Ratio: The aspect ratio of the camera. Values below the
Viewportaspect ratio are ignored. - Camera Speed: Movement speed of the camera.
- Fast Mode Multiplier: Multiplier for moving the camera faster in the scene while holding Shift.
- Camera Near Plane: The near plane of the viewing frustum.
- Camera Far Plane: The far plane of the viewing frustum.
- Automatic Frustum: When enabled,
Camera Near PlaneandCamera Far Planeare comptued automatically as theViewportcamera moves.
¶ Camera Adjustments
- Hue: Performs an overall adjustment to the hue of the image.
- Saturation: Performs an overall adjustment to the saturation of the image.
- Lightness: Performs an overall adjustment to the lightness of the image.
- Contrast: Performs an overall adjustment to the contrast of the image.
¶ Environment Settings
- Render Mode: Sets the active render mode. By default this is set to the
PBRrender mode for physically-based lighting and reflections. - Environment: Sets the environment image used as a background and illuminates the scene.
- Opacity: Sets the opacity of the environment image. Setting to "0" will remove the appearance of the environment while still generating lighting and reflections.
- Blur: Sets the blur amount for the background environment image.
- Rotation: Sets the rotation of the environment image. In addition to this setting, the keyboard shortcut Shift + Right Click and dragging left and right on the
Viewportwill rotate the environment. - Continuous Rotation: Enabling this will continuously rotate the environment image.
- Orbit Camera: Enabling this will continuously orbit the camera around the scene effectively creating a "turntable" for quick design reviews.
¶ Scene Settings
- Show Grid: Renders a grid that automatically adjusts its cell size based on the position of the camera.
- Show Normals: Shows the vertex normals of the objects in the scene.
- Show Statistics: Display scene statistics.
- Show Selection Info: Displays pivots and names of selected objects.
- Filter Selected: When enabled, only selected objects will be processed by InstaLOD. If objects are selected, others will be hidden in the
Viewport. - Highlight Selection: Highlight selected objects.
- Unselected Opacity: When using
Filter Selected, determines the opacity for unselected meshes. - Selection Color: Specifies the color used to highlight selected meshes in the viewport.
- Show Clipping Planes: Show clipping planes used by a remeshing operation.
¶ Gizmo Settings
- Transform Mode: The currently active gizmo transform mode.
- Pivot: The gizmo pivot.
- Orientation: The orientation of the gizmo axes.
- Positional Increment: When holding J while moving the gizmo, snaps the gizmo to the specified interval.
- Angular Increment: When holding J while rotating the gizmo, snaps the gizmo to the specified interval.
¶ Render Settings
- Wireframe Overlay: Renders a wireframe on the meshes in the scene.
- Wireframe Color: Color of the wireframe when
Wireframe Overlayis enabled. - Wireframe X-Ray: Show wireframe for hidden meshes.
- Show Boundary Edges: Renders boundary edges of selected meshes.
- Boundary Edge Color: The color of the boundary edges when 'Show Boundary Edges' is enabled.
- Show Backfaces: Toggles rendering backfaces.
- Occlusion Culling: Renders only meshes that are visible in the
Viewport. Note:Occlusion Cullingis not restored after application restart. - (FXAA) Anti-Aliasing: When enabled, renders the scene with Fast Approximate Anti-Aliasing.
- Anti-Aliasing Sample Count: (Appears when MSAA is enabled) The sample count used for MSAA. Higher values can slow down the frame rate
- Material AO Intensity: Adjusts the intensity of the Ambient Occlusion channel in the
Viewport. This does not affect the levels of AO map directly but the visual appearance in theViewportonly. - Displacement Middle: The material displacement middle.
- Displacement Mode: The mode used when rendering displacement in the scene. Choose between
TessellationandPOM: Parallax Occlusion Mapping. - Displacement Factor: Controls the factor at which displacement gets applied.
- Tessellation Level: Controls the tessellation factor of the scene. Increasing the level of tessellation on a mesh with already dense topology will decrease performance.
- Bloom Strength: The strength of the bloom effect.
¶ Raytraced Effects
- Shadows: Enables rendering of raytraced shadows.
- Shadows Attenuation: The reduction of shadows intensity with distance
- Shadow Bias: Adds a bias to shadow calculations to prevent rendering artifacts.
- Raytracing Frame Count: The maximum number of raytracing frames to accumulate for denoising.
- Render Quality: The render quality of the raytraced effects. Note: A higher quality requires more processing power and may result in lower frame rates and an unresponsive user interface. It's recommended to use Very High' only when rendering a beauty shot.
 The
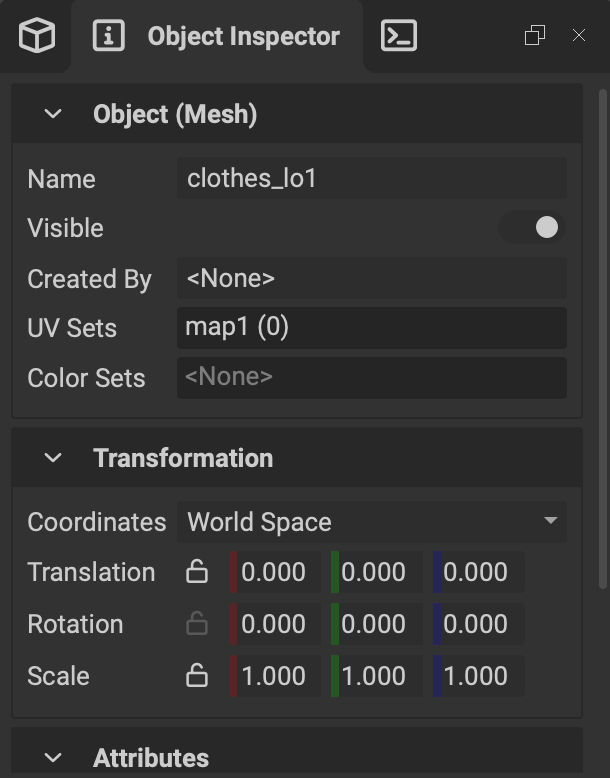
The Object Inspector panel contains settings for the currently slected object in the Outliner. These settings include properties like the object's name and visbility as well as transformation and Custom Attributes.
The following overviews the settings available in this panel:
¶ Object
- Name: The name of the object.
- Visible: Visibility of the object.
- Created By: Mesh operation that created the object.
- UV Sets: Mesh operation that created the object.
- Color Sets: Vertex color sets of a mesh.
¶ Transformation
- Coordinates: The coordinate system of the displayed transformation.
- Translation: Translation of the object.
- Rotation: Rotation of the object.
- Scale: Scale of the object.
¶ Attributes
This section contains custom attributes for the selected object. These attributes can be used in conjunction with our scene rules and mesh match rules systems.
To learn more about scene rules check out our articles in our Knowledge Base:
 The
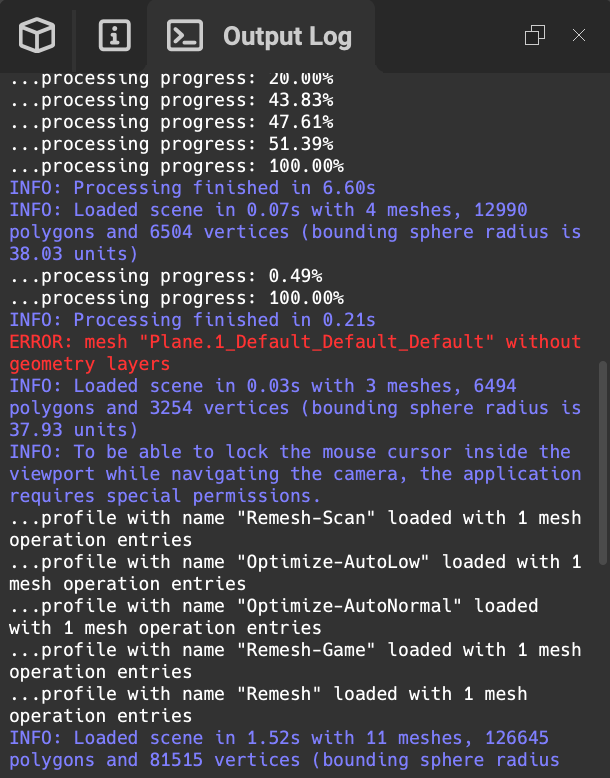
The Output Log panel displays console messages from InstaLOD.
 The
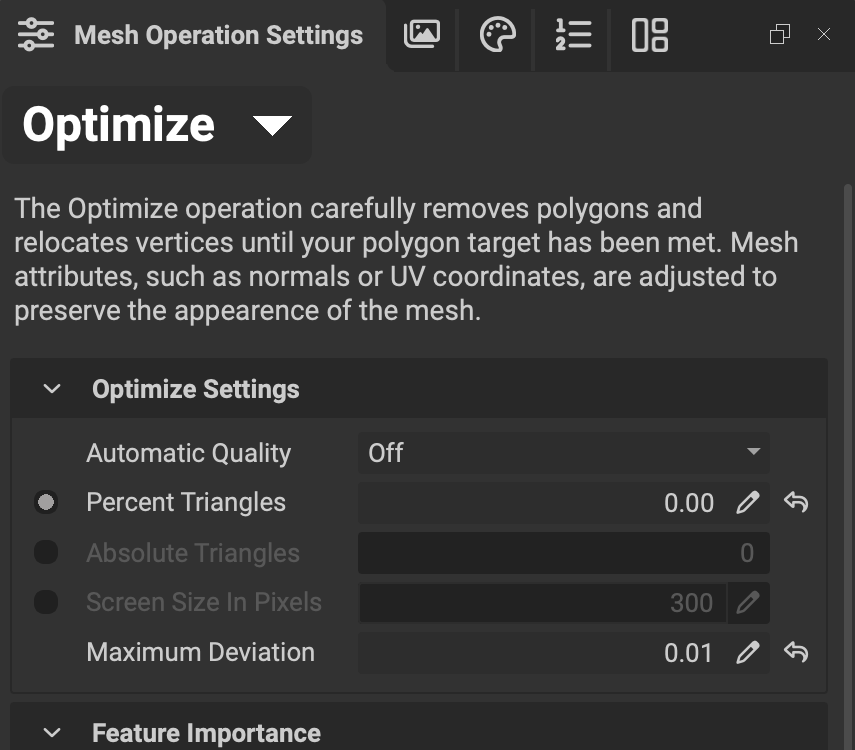
The Mesh Operation Settings panel contains settings for the currently selected mesh operation. The large dropdown menu at the top provides access to the available mesh operations within InstaLOD.
At the bottom are additional settings for our Mesh Match Rules system and additional Operation Settings.
 The
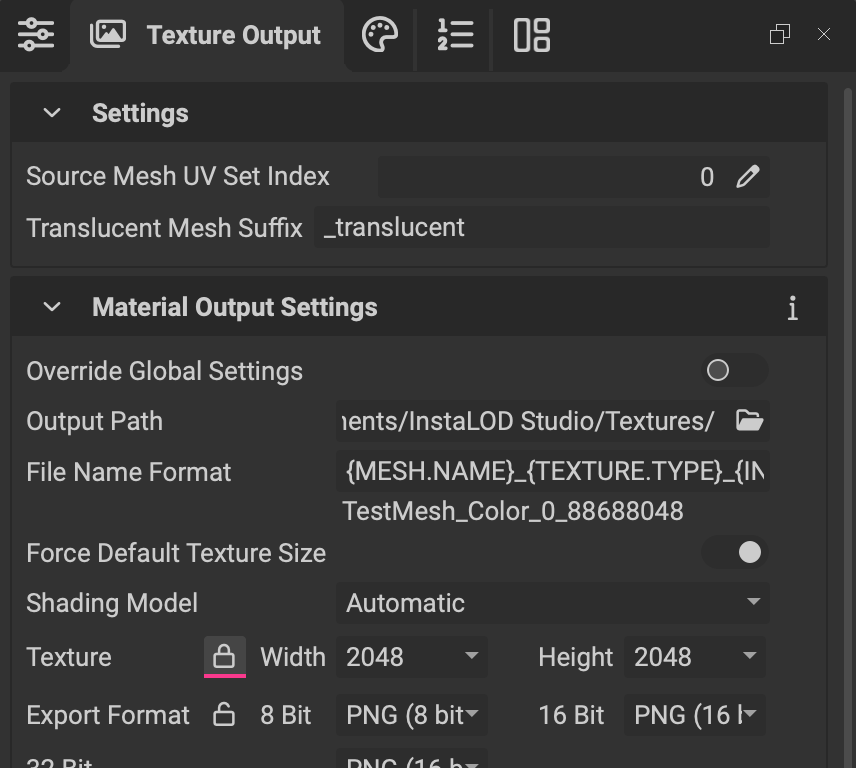
The Texture Output panel contains settings for any mesh operations that provide textures as an output. Settings such as the output format and resolution can be set here.
The following overviews the settings available in this panel:
¶ Settings
- Source Mesh UV Set Index: The UV channel of the source mesh used when sampling texture pages.
- Translucent Mesh Suffix: Mesh names that match the translucent mesh suffix will be marked translucent for the ray tracer. Translucent surfaces can also be setup when using textures with an alpha channel. When not using a
Custom Texture Page Configurationtexture names that contain the string 'alphamask' will be used as alpha mask. When using aCustom Texture Page Configurationtextures that act as alpha masks must be setup manually.
¶ Material Output Settings
- Override Global Settings: Override the global material output settings for the selected mesh operation entry.
- Output Path: Output path for textures generated by InstaLOD.
- File Name Format: The output filename format using InstaLOD Script built-in variables.
- Force Default Texture Size: Forces the output texture size to match the default width and height.
- Shading Model: When exporting a scene, materials of the specified type are used. Sele n the texture output. Note: This currently affects the FBX export only.
- Texture: The default output texture size.
- Export Format: The output format when exporting textures of the specified depth.
¶ Texture Pages
- Super Sampling: Enables super sampling of texture pages. Note:
Super Samplingcauses an exponential increase in memory usage and processing time. - Texture Filter: The texture filtering used when sampling textures.
- Solidify Texture Pages: Enables solidification of texture pages to avoid pixel bleed.
- Dilation In Pixels: The dilation size to avoid mipmap pixel bleed.
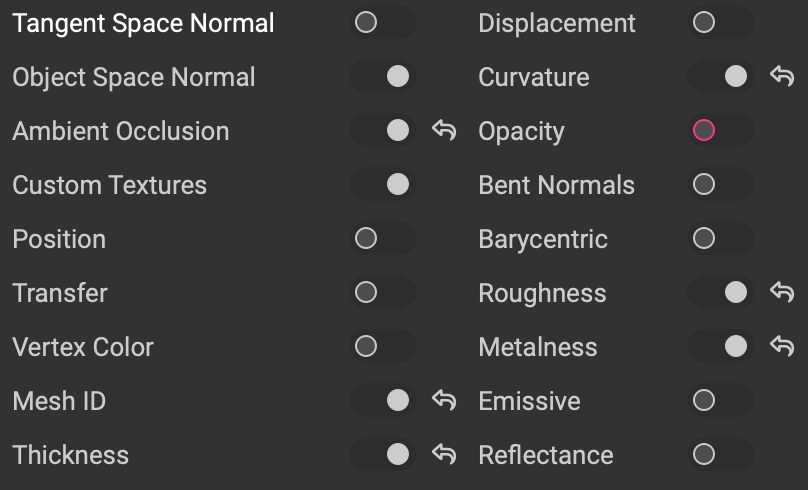 Enable the switch to the right of the corresponding texture page to include it in the mesh operation.
Additional settings will appear based on the enabled texture pages.
¶ Delight Settings
Once enabled, InstaLOD will use delighting to remove baked in shadows and highlights from the texture pages.
- Shadow Kernel: The kernel size in pixels when detecting shadow or highlight areas.
- Strength: The overall strength of the delighting.
- Highlight Removal: The highlight removal strength.
- Shadow Removal: The shadow removal strength.
- Falloff: The falloff size for highlight/shadow detection.
 The
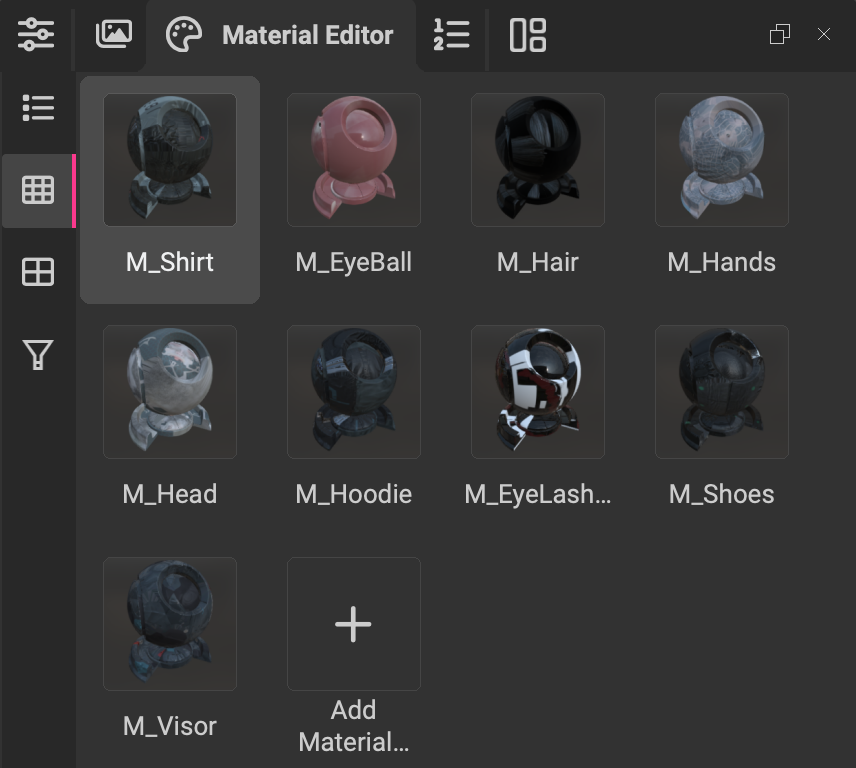
The Material Editor panel contains all materials assigned to the active scene including those created by mesh operations. This allows for quick and easy setup of realistic PBR materials.
Available materials are found at the top of the panel. The bottom section provides access to that material's channels and their settings.
To learn more about the Material Editor panel, read our dedicated article here.
 The
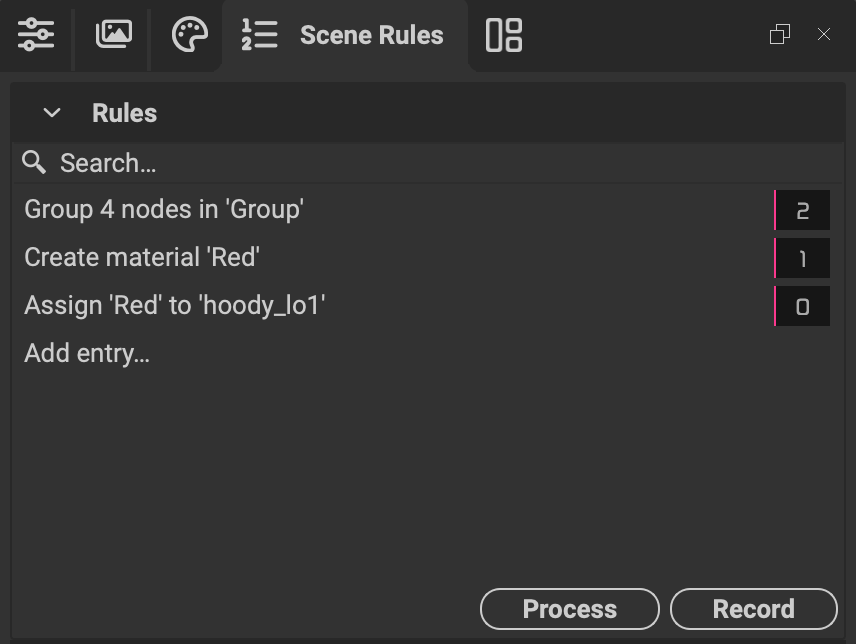
The Scene Rules panel provides access to InstaLOD's scene rules engine.
InstaLOD features a powerful rules engine with which data can be prepared and cleaned up for further processing.
The traditional PLM workflow requires many manual changes. Hierarchies often need to be modified, geometry configured, tessellation changed on a per-part level, shading corrected, and materials need to be set up.
Using the rules engine in InstaLOD Studio, this workflow can be automated. Once rules have been established, they can be saved in a JSON profile and applied whenever the source data changes.
To learn more about scene rules, please read the following articles in our Knowledge Base:
 The
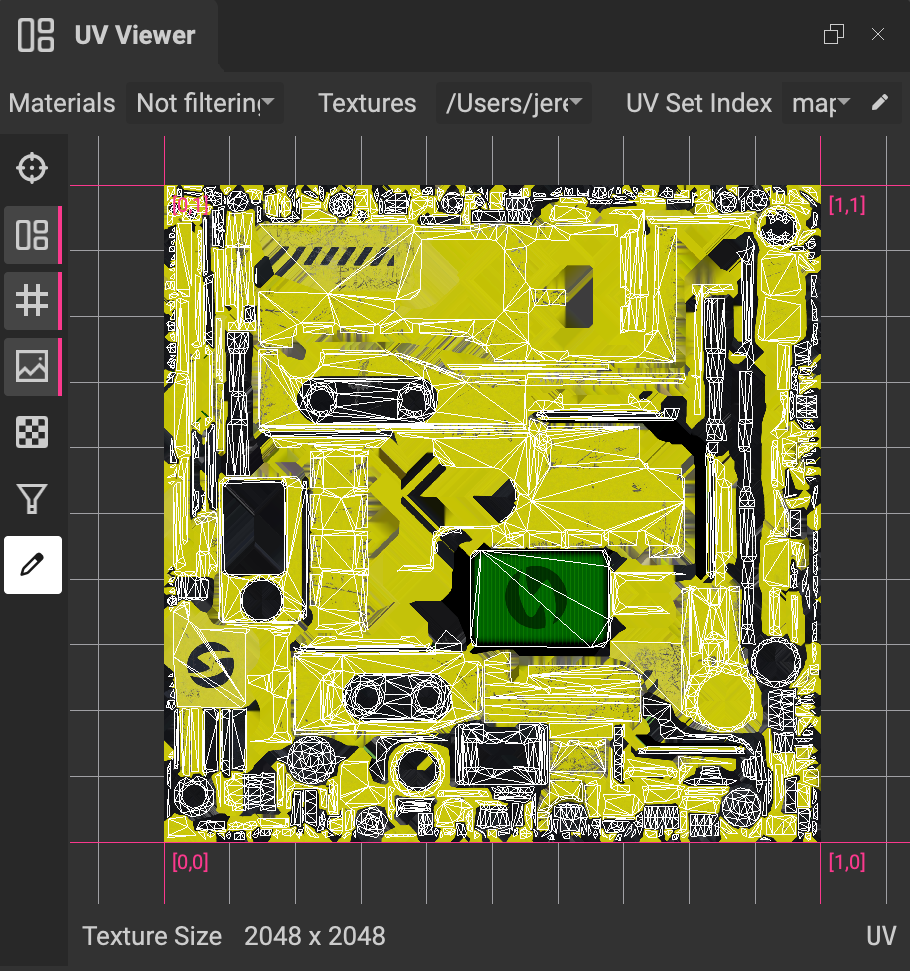
The UV Viewer panel displays the UV coordinates and 2D textures assigned to the selected objects in the Outliner.
Various viewing options are available via the dedicated toolbar along the side.
Across the top are a set of menus for filtering and displaying the associated maps and materials assigned to the selected objects.
Along the bottom is a dedicated status bar displaying the size of the current texture displayed.