¶ What is InstaLOD for Cinema 4D?
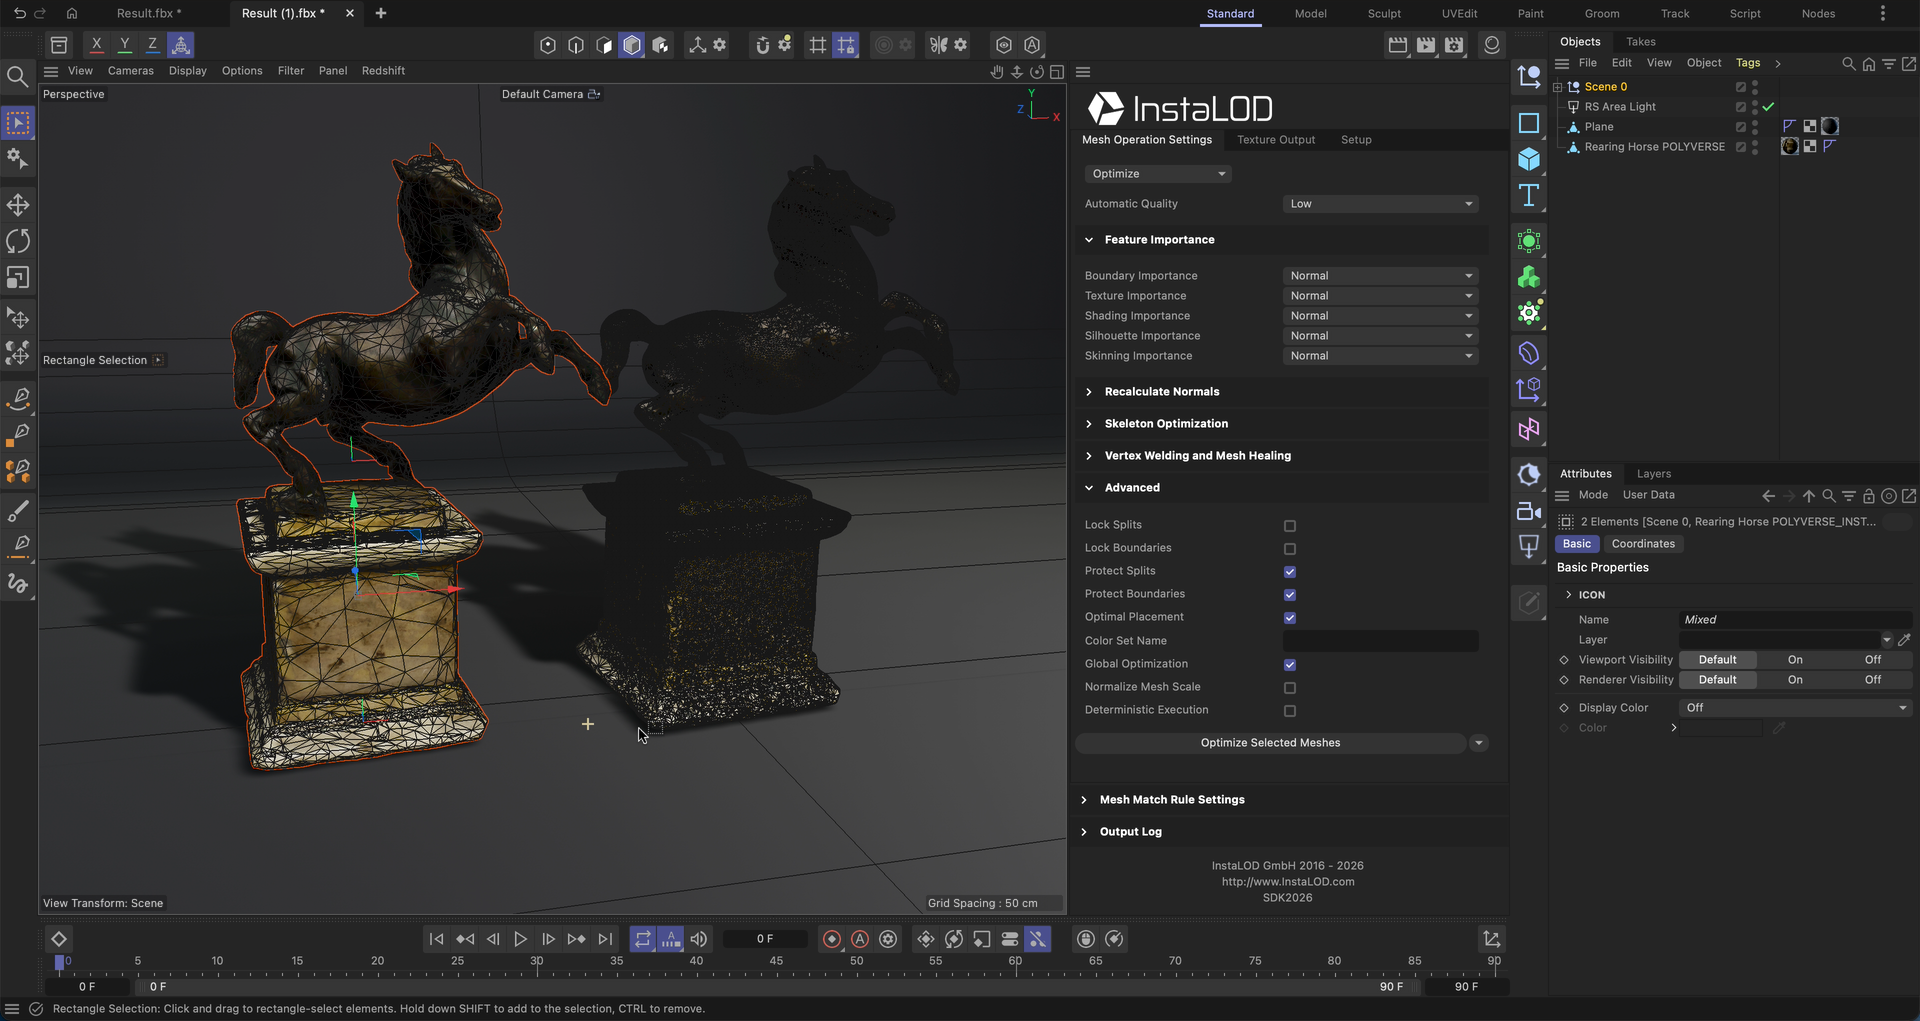
InstaLOD for Cinema 4D enables you to optimize 3D meshes without having to leave your favorite DCC tool. The integration features a graphical user interface, supports complex batch operations and can be scripted with its Python scripting-based API. Great care has been taken to ensure a high degree of usability and productivity, even when using InstaLOD for Cinema 4D for the first time.
Please refer to the InstaLOD Studio documentation for an overview of all features.
¶ Compatibility
InstaLOD for Cinema 4D runs on both macOS and Windows.
The following versions of Cinema 4D are supported: 2026.
Our development team strives to implement support for the most recent software release at the earliest possible opportunity.
¶ Prerequisites
InstaLOD for Cinema 4D uses InstaLOD Studio as backend for optimization operations. InstaLOD Studio must be installed before you can start using InstaLOD for Cinema 4D. Please refer to the InstaLOD Studio documentation on how to install InstaLOD Studio on your workstation.
InstaLOD for Cinema 4D supports authorizing licenses and displaying license info from within Cinema 4D.
¶ Where to Download InstaLOD for Cinema 4D
Sign in to Abstract ID to manage your licenses and access downloads across the Abstract ecosystem, including InstaLOD, InstaMAT, RSX Engine, and Polyverse.
¶ Installing InstaLOD for Cinema 4D
To install InstaLOD for Cinema 4D you need to copy the plugin files into a Cinema 4D plugins directory.
¶ Default Plugin Path
- Download the
InstaLOD for Cinema 4D (Windows_MacOS).zipfile. - Extract the archive.
- Copy the extracted
InstaLODfolder into Cinema 4D's plugins directory. The default plugins directory is typically found at:
| Platform | Path |
|---|---|
| Windows | C:\Users\ <Username> \AppData\Roaming\Maxon\Maxon Cinema 4D <VersionString> \plugins |
| macOS | /Users/ <Username> /Library/Preferences/Maxon/Maxon Cinema 4D <VersionString> /plugins |
If any part of the installation path's folder structure doesn't exist, simply create it.
Note for macOS: The Library folder is hidden by default. You can use Cmd + Shift + . to show hidden files in the Finder. Alternatively, you can use the
Go To Folderfeature using Cmd + Shift + G to navigate to the folder directly.
¶ Custom Plugin Path
Alternatively, you can add a custom plugin directory in Cinema 4D:
- In Cinema 4D, open
Edit>Preferencesand selectPlugins. - Click
Add Folderto add a new plugin directory. - Copy the extracted
InstaLODfolder into the custom directory. - Restart Cinema 4D.
Please note that the custom plugin directory must not be located inside Cinema 4D's installation directory (e.g.
C:\Program Files\Maxon Cinema 4D 2026), as these paths are ignored. Use a separate folder, such as one under yourDocumentsdirectory.For more details on Cinema 4D plugin locations, see Maxon's plugin documentation
It is recommended to delete
__pycache__files from the plugin files and delete or uninstall any old plugin version before installing a new version.
¶ Activate InstaLOD License
If your machine has already been authorized for InstaLOD you can start using InstaLOD for Cinema 4D without further action.
If your machine has not yet been authorized, you will be required to enter your license information in the dialog box to authorize your workstation.
¶ Getting Started with Cinema 4D
Once the plugin folder is copied to your Cinema 4D plugins directory, you can start Cinema 4D. The plugin will automatically create an InstaLOD menu item in the top toolbar.
To open the InstaLOD window, click InstaLOD in the toolbar and select Open InstaLOD from the menu.
On the first start of InstaLOD, it is necessary to point InstaLOD for Cinema 4D to the installation directory of InstaLOD Studio. Click the folder button, browse to the InstaLOD Studio installation directory on your workstation, and confirm the selection.
If InstaLOD Studio was found in the specified directory, the window contents will change. If your machine has already been authorized for InstaLOD you can start using InstaLOD for Cinema 4D now. If your machine has not been authorized for InstaLOD yet you can enter your license information in the dialog to authorize your workstation.
Please refer to the InstaLOD Studio documentation for an overview of all features.
¶ Optimizing a Single Mesh
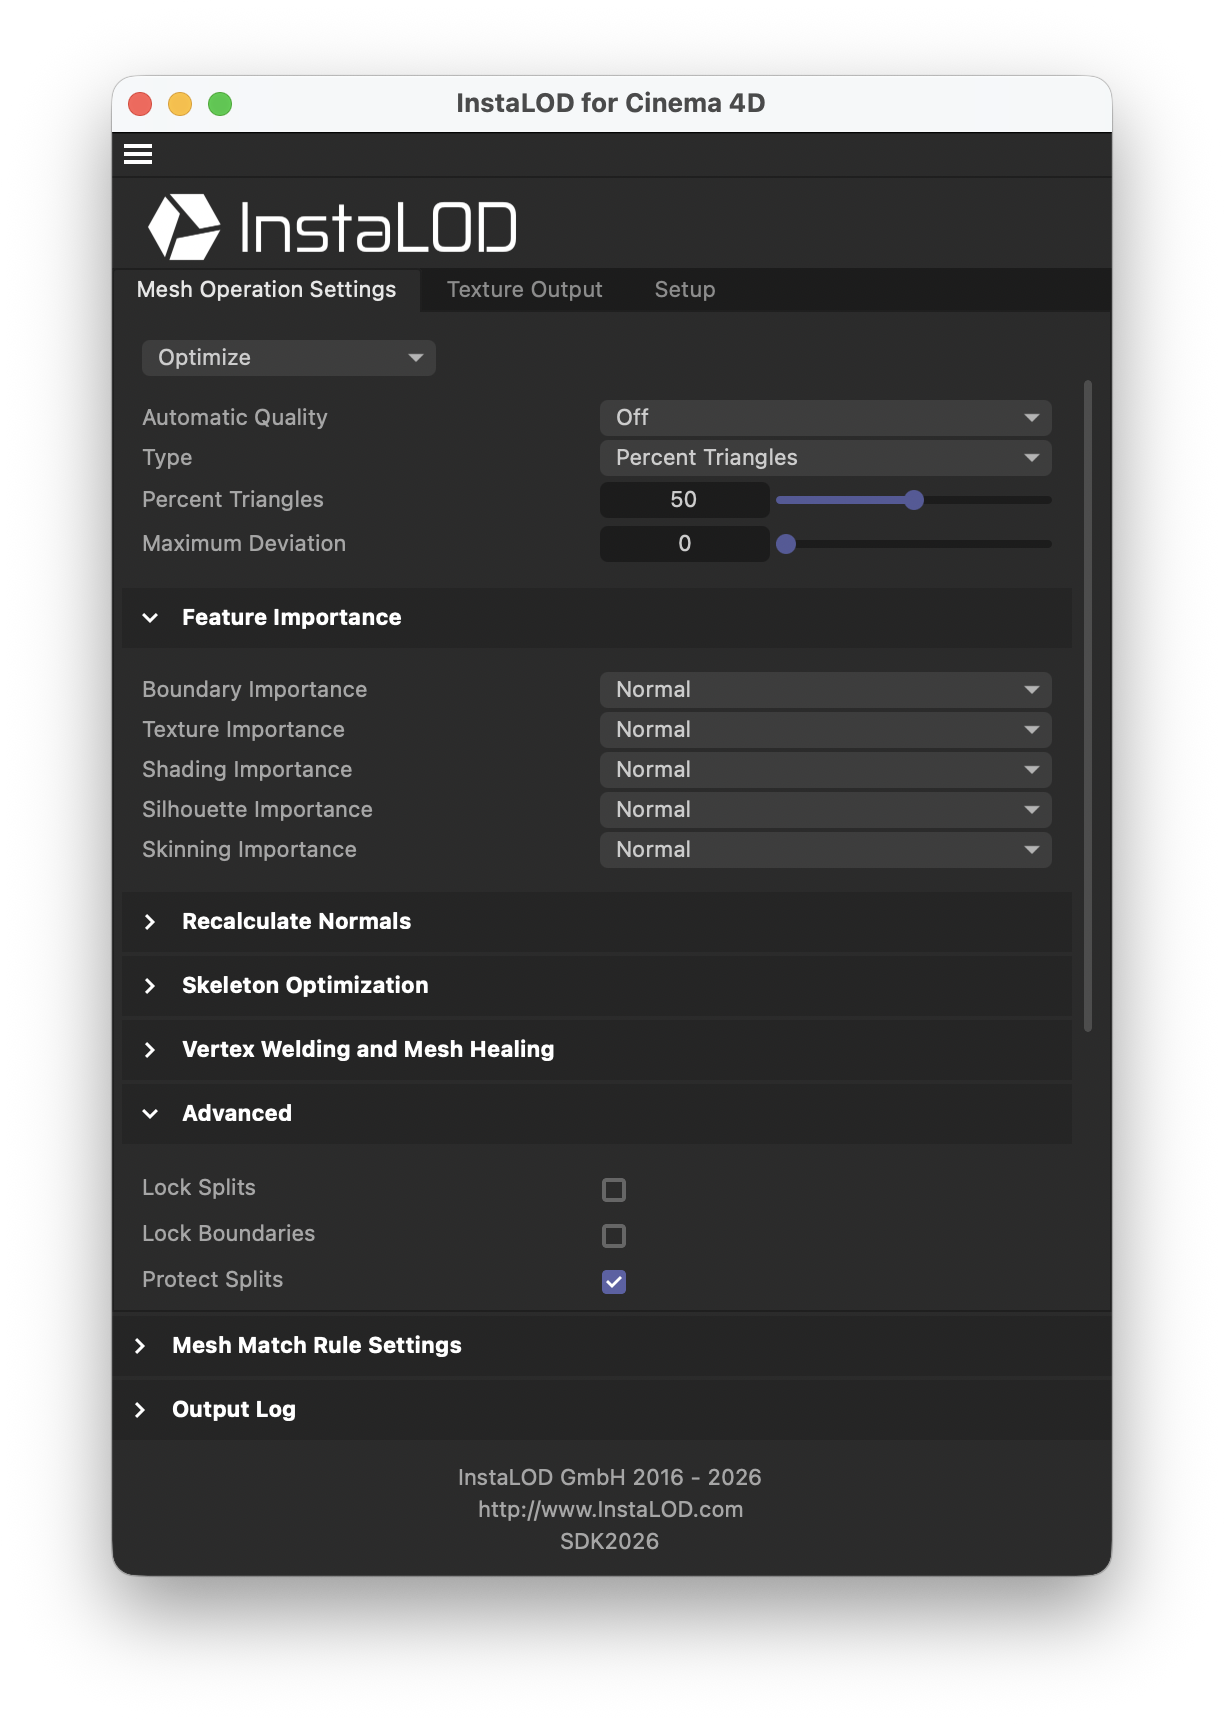
To optimize a mesh select the mesh in the viewport or hierarchy. In the Mesh Operation Settings tab in the InstaLOD window, choose Optimize from the dropdown at the the top. Choose either a level of quality from the Automatic Quality dropdown, or select a percentage of triangles for the output mesh with the Percent Triangles slider.
Click the Optimize Selected Meshes button at the bottom of the window to optimize the mesh. Cinema 4D will export the geometry to InstaLOD and start the optimization.
Once the geometry has been exported, InstaLOD will execute the mesh operation asynchronously, and import the results back into Cinema 4D.
Both skeletal and static meshes are supported by InstaLOD for Cinema 4D.
¶ Optimizing Multiple Meshes
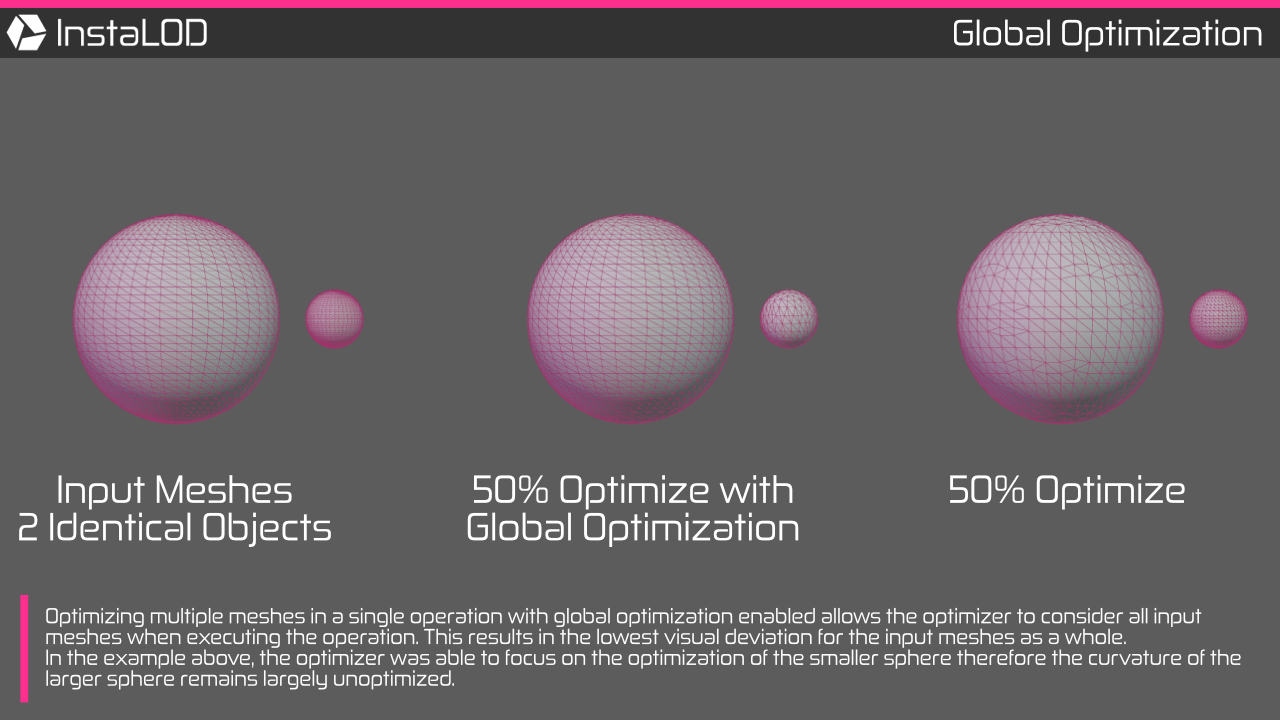
Optimizing multiple meshes in a single operation with global optimization enabled allows the optimizer to consider all input meshes when executing the operation. This results in the lowest visual deviation for the input meshes as a whole.
Global optimization is enabled by default, but can be disabled by unchecking the checkbox in the Advanced Settings found on the Optimize tab.
Optimizing multiple meshes works identical to the optimization of a single mesh.
Select all meshes to be optimized in the viewport or hierarchy, enter the optimization target value, and click the Optimize Selected Meshes button to optimize all currently selected and visible meshes.
¶ Creating Batch Operations
By clicking the small button next to the mesh operation execution button and selecting Save as Batch Profile, the current mesh operation settings will be saved as a batch profile inside the directory of your InstaLOD Studio installation.
Batch profiles can be found on the Mesh Operation Settings tab by clicking the mesh operation dropdown and selecting Batch.
Once created, these saved profiles can be selected and executed on the current mesh selection in parallel. This is a great way to create a complete LOD chain with a single click.
¶ Deleting Batch Profiles
To delete a saved batch profile, navigate to the Batch area as described above. Click the small button next to the Execute Batch button and select Delete Selected Batch Profiles to delete all selected profiles.
¶ Exporting Settings and Batch Profiles for InstaLOD Pipeline
To export a profile that can be used with InstaLOD Pipeline without modification, configure your mesh operation, then click the small button next to the mesh operation execution button, and select Export As InstaLOD Pipeline Profile....
Another great feature of InstaLOD for Cinema 4D is the ability to create and export multi operation batch profiles for InstaLOD Pipeline.
To export a multi operation batch profile, open the Batch tab and select all saved batch profiles that will be included in the multi operation. Click the small button next to the Execute Batch button and select Export As InstaLOD Pipeline Profile... to export the profile for InstaLOD Pipeline.
Profiles exported with InstaLOD for Cinema 4D have a hard-coded profile name of Cinema4D. When queuing files with InstaLOD Pipeline, the profile needs to be specified:
InstaLODCmd -profile ExportedWithCinema4D.json -file Data/SM_Zetsuda_130k.fbx Build/SM_Zetsuda_Optimize.fbx Cinema4D
¶ Importing Settings from an InstaLOD Profile
To import mesh operation settings from a saved InstaLOD profile, navigate to the Setup tab and select Open Profile.
The integration will apply the settings from the profile to the dedicated tab for the loaded mesh operation.
To successfully load a profile into the integration, the profile must contain a single mesh operation entry. Profiles containing multiple mesh operations are currently not supported.
¶ Executing an External Profile
InstaLOD for Cinema 4D can execute a saved InstaLOD profile externally using InstaLOD Studio. The processed results are then automatically imported into Cinema 4D. This feature allows for the simultaneous processing of multiple mesh operations and execution of Scene Rules and Mesh Match Rules from a profile created in InstaLOD Studio.
To execute an external profile:
- Navigate to the
Setuptab. - Under the
Execute External Profilesection, click the to input the path to the profile. - Select the objects in Cinema 4D to process and click
Execute External Profile.
The selection will be processed with the chosen profile, and the results will then be imported into Cinema 4D.
¶ Setting the Output Path
For mesh operations that utilize InstaLOD's baker such as Remesh (RE), Imposterize (IM), Material Merge (MM), and Bake (BA), an Output Path must be specified. The Output Path can be set in the Bake Output (BO) tab under the Output Folder and File Names section.
¶ Known Limitations
InstaLOD for Cinema 4D is using InstaLOD Studio as a processing backend. Meshes between Cinema 4D and InstaLOD Studio are exchanged through the glTF file format by default. Some operations such as Bake, Quad Remesh, and camera-based Occlusion Cull require FBX and will automatically use it.
Additionally, Cinema 4D's glTF exporter requires textures for Reflectance Strength and Roughness Strength to share the same aspect ratio, as they are encoded into a single bitmap on export. The same restriction applies to Color and Alpha textures. As a result, materials that use an opacity map may not be exported and imported correctly, as the opacity map can be lost during the process.
For more details, refer to the Cinema 4D glTF exporter documentation.
¶ Website
Please visit http://www.InstaLOD.com to stay up to date!
Thank you for using InstaLOD.