¶ About this document
3D printing is a rewarding and powerful tool that is used across various industries; from rapid prototyping in enterprise companies to hobbyist modeling in private households. Unfortunately, not all 3D models can simply be sliced and printed due to a variety of requirements that need to be met to guarantee a successful print. If a 3D model is not prepared properly, the slicer will either not be able to prepare the file for printing, or the printer will print incorrectly and create a broken result.
¶ Mesh Requirements
A few of the most important requirements are the following:
- Watertight mesh
- Single solid mesh (no combined/kitbashed sub-meshes)
- Fixed geometry (no broken/non-Manifold/degenerate/flipped normals etc.)
- Reasonable polygon count for the slicer to handle (not too high poly)
- The file type needs to be supported by the slicer program (e.g. .STL)
Depending on the use case and the slicer program used, these requirements might vary.
¶ Mesh processing for 3D printing
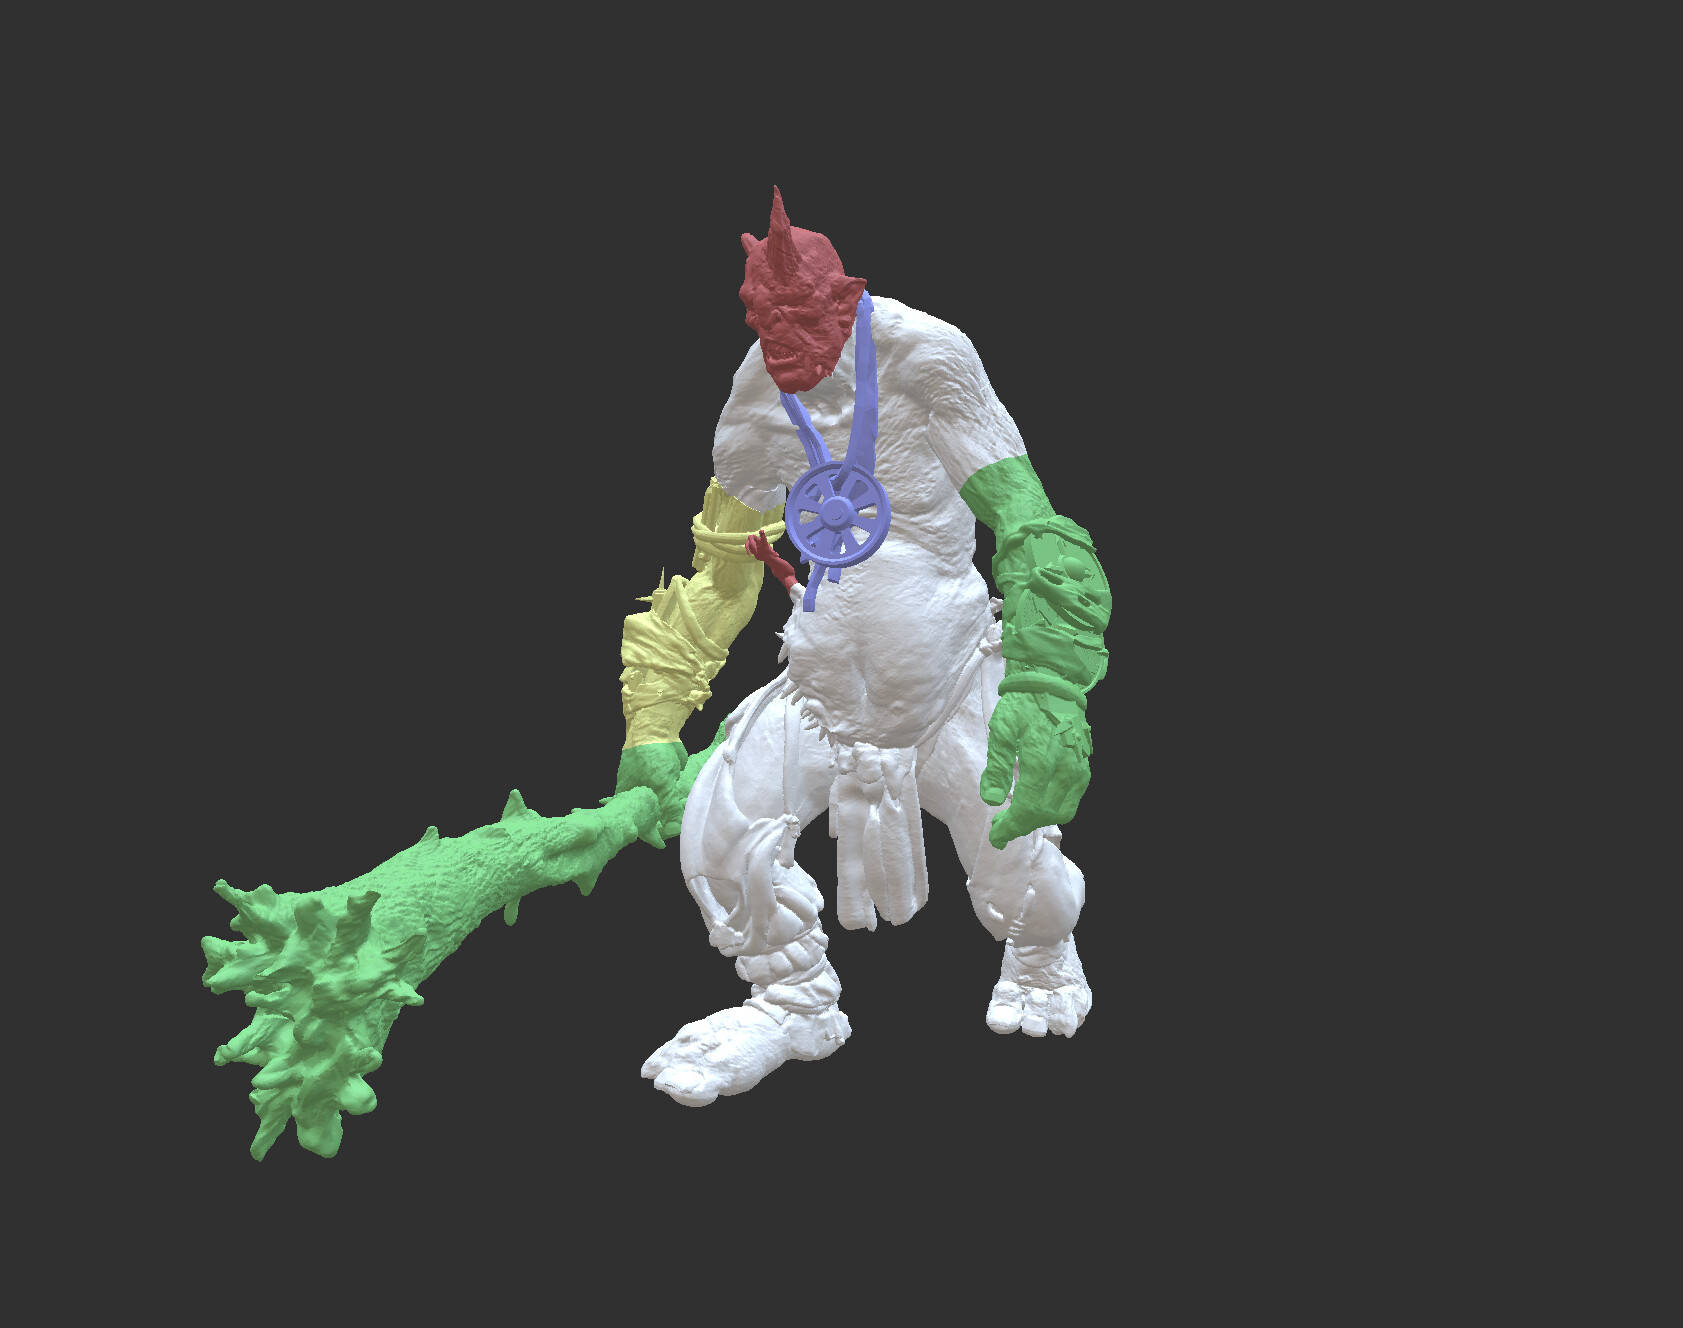
For this example, a high-poly 3D-sculpted mesh is used. The model is made up of multiple sub-meshes and has holes, non-manifold geometry, and other issues that will cause problems when trying to print the model in its current state.
¶ Fix geometry
Fixing the geometry is the first important step. Not only does this improve the printability of the model, but it also helps with the optimization of the model down the line. Incorrect surface shading and other attributes can cause problems in the optimization stage as they would typically be considered important by InstaLOD which can result in splits, holes, and other problems. Although the remesh feature (which will be used later) is capable of modeling over broken geometry and creating clean meshes, the input geometry should be fixed nonetheless, because surface shading or hard angle edges are still transferred onto the low poly mesh.
As a first step, vertex welding will make sure that all vertices are connected properly.
Recalculate Normals is then used to calculate the correct surface shading. The optimizer and the remesher both use input shading information when processing, therefore, good input shading is important to generate good optimization behavior for the output model.
Additional steps like Fill Holes, Conform Normals, or Remove Degenerate Faces can be applied in this step if necessary, to clean up the input geometry.
Before/after vertex welding and normal recalculation:

Fixed/Recalculated normals render the surface smooth and give InstaLOD better surface information for the optimizer to work with.
¶ Remesh
Remeshing is an automated solution that, in this context, makes 3D geometry printable. The remesher automatically reconstructs the input mesh and creates new, clean geometry. The benefit that this has, is that it creates a single solid model from multiple input meshes, which otherwise typically requires a lot of manual work.
Before VS. After Remeshing
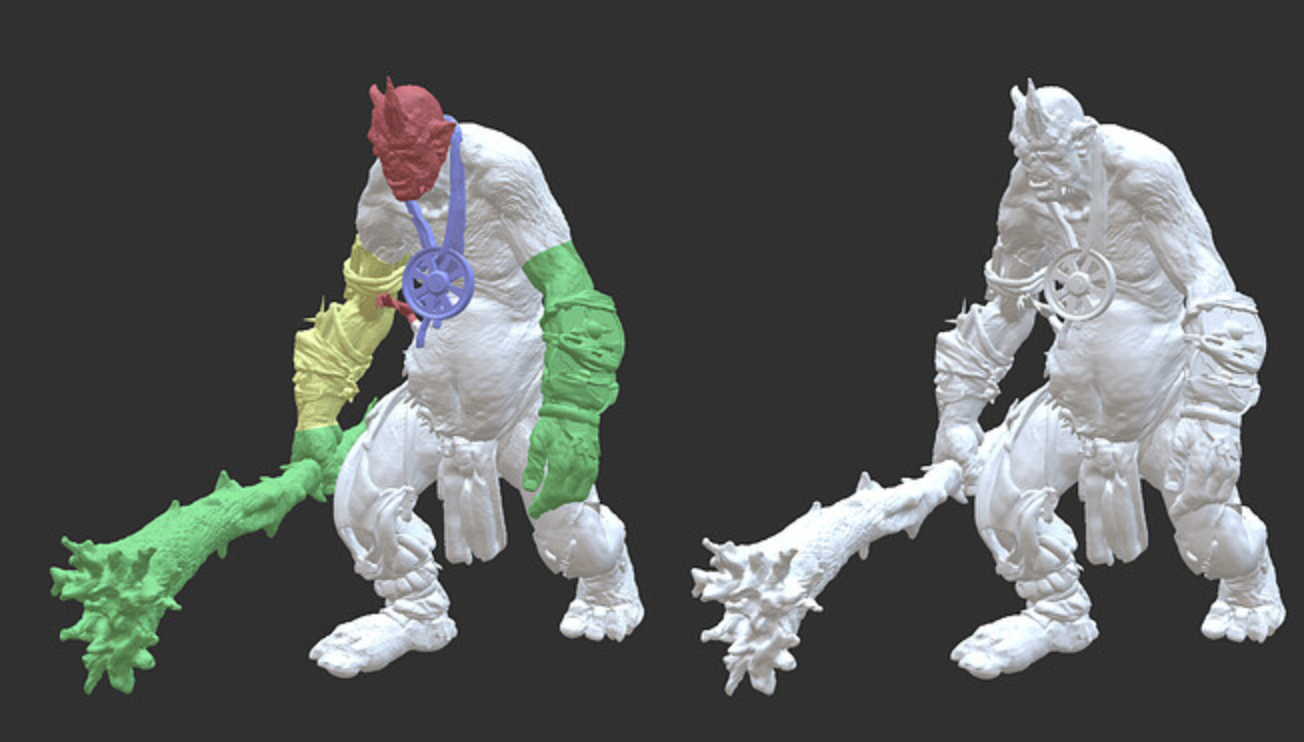
Multiple original parts vs (remesh) single watertight model
As a high level of detail is typically desired for 3D printing, the following settings are recommended as a point of reference:
- Mode: Reconstruct
- Fuzzy Face Count Target: Highest (to generate enough polygons to reconstruct the desired details)
- Resolution: Depending on surface detail use High, Very High, or Extreme (to model out all right-angles and details, without creating bridging polygons or modeling over details)
- Texture Output: Disable all texture channels to speed up the remesh process (as printers typically can not utilize texture information)
In this example, a clipping plane is added in the remesh process to remove unnecessary geometry on the ground.
¶ Final Touches
After remeshing the model, it's recommended to recalculate the normals of the output mesh with a hard angle threshold of 0. This creates hard shading for each polygon and gives a good preview of what the final 3D print will actually look like. If the model looks too "chunky" consider increasing the output polygon count.
If not enough details were captured, remesh the model again, and increase the resolution. If an overall higher amount of polygons is desired, increase the fuzzy face count, or manually set a maximum triangle count.
As a clipping plane was used in this example, the bottom of the mesh is open. Therefore, a final Fill Holes will be applied via the mesh window to make the model watertight and ready for 3D printing.
¶ Printing
Export the file using a format that is supported by your slicer program by navigating to File -> Export Scene. Typical 3D printing file formats include .STL and .OBJ. A full list of our supported export formats is listed here.
Open the print-ready file in a slicer program, slice it using your preferred settings, and export the G-code to your 3D printer.
Happy printing!
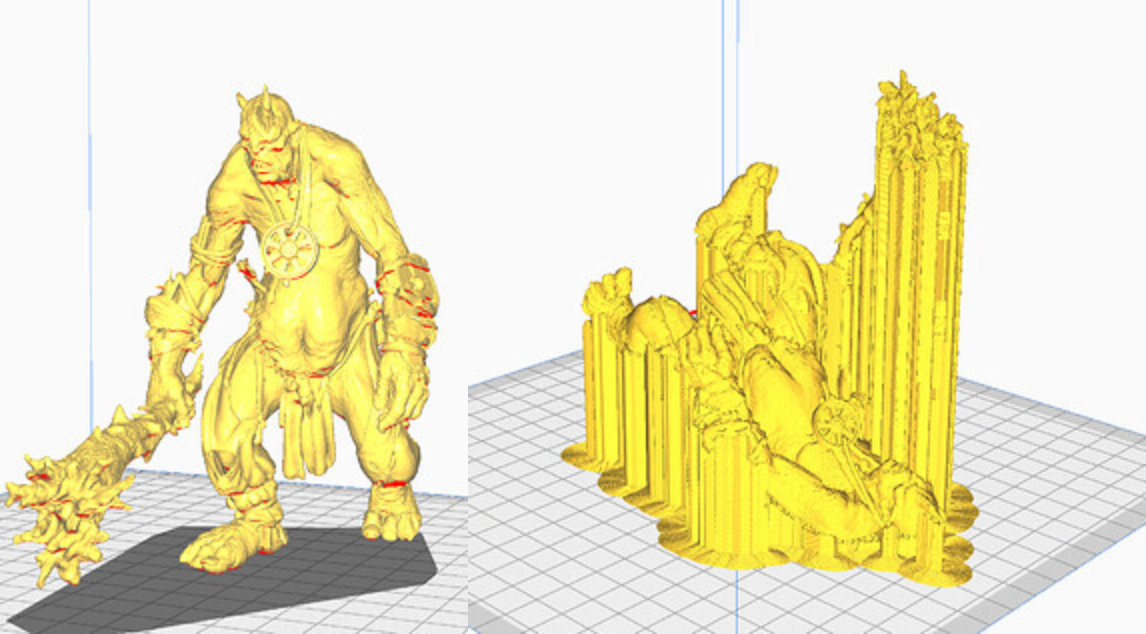
Model imported into slicer software. Model sliced and supported.